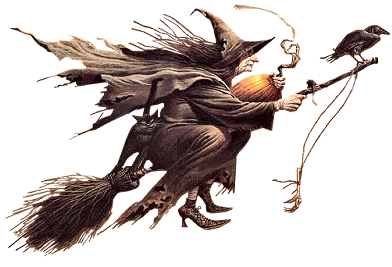
| First Witch | Here I have a pilot's thumb, | ||
| Wreck'd as homeward he did come. | 30 | ||
| Drum within. | |||
| Third Witch | A drum, a drum! | ||
| Macbeth doth come. | |||
| ALL | The weird sisters, hand in hand, | ||
| Posters of the sea and land, | |||
| Thus do go about, about: | 35 | ||
| Thrice to thine and thrice to mine | |||
| And thrice again, to make up nine. | |||
| Peace! the charm's wound up. MACBETH - WILLIAM SHAKESPEARE |
you about the Skull Tree.I created this tree using COLD PORCELAIN clay (my recipe can be found at this link)http://www.scribd.com/doc/52976927/Cold-Porcelain-Recipe-Instructions-With-Pictures and paper clay that I sculpted to look like a tree. This took me about a year to finish it the way I wanted it.Not because it was that hard .It took me that long because I have to let the things I create 'talk' to me.I refuse to finish something 'just because' so I worked a little on it over the time of a year and finally it told me what it wanted to be.Sounds crazy? Yea ,but that's just how it is with me ....
 |
| I added a knot hole here |
I have a cardboard covered with a black trash bag as the base,that way I will be able to move it with out fear of it cracking .
 |
| unfinished spooky tree click image for larger view |
 |
| bottom roots detail |

After I sculpted it and let it dry I let it cure for about 1month so it would be nice and hard when I started to paint it.I did this because the paper clay still absorbs moisture and I didn't want it crumbling under the brush. I chose to add black first ,using a dry brush strokes .Just dab paint and brush off on a rag ,then brush over the tree.I added 2 colors of brown then a dry brush stroke with white.The final coat was a light coat of dark beige.Let it dry for a few days ,then took my little trusty drill (that I scraped up 60 bucks in change to get ) and drilled holes to add my branches to.The branches are not meant to stay because they can not hold much weight . But for now I glued them in with a glue gun.I placed it on top of my TV shelf added all those scraps from my spooky cloth to the limbs to give it the old look.The skulls are Styrofoam and very light .This allowed me to hang them without fear of breaking the limbs. I used paper clips to hang them by opening the clip and pushing one end into the top of the skull then hung it .Adding the cloth to hide the silver metal.Spooky cloth covers the top of the stand and around the tree roots. Putting some skulls around like they had 'fallen' from the tree . There it is my skull tree .If you ever decide to make one I would LOVE to see it !

Voodoo/Mad Lab Prop
This is just a mix of things that went on the hall cabinet .These are very easy to create and almost anything will work.
Supplies
Jars (given to me ) as many as you want to make
Clear vase (your choice)
Bones and skulls ( dollar store 2 bucks)
Bowels (given to me ) as many as yo want
Ash or Sand ( free)
Glass bottled (given to me )
Large Hemp Twine (or what ever you have )
Dry Moss/Grass( floral department at your local store 1 buck)
Candle ( delabled .given to me )
Skull candle holder (your choice and I forgot a candle lol.)
Skull cup ( Dollar Tree 1 buck)
Voodoo Doll (I hand sewed this with scraps )
 First the Voodoo Doll was cut from a free pattern I got off the net (and I forgot where ) After stuffing her I used blue thread to but stitches in different places to give her a creepy feel.I free hand cut the dress and sewed it together.Giving her x eyes and a sewed shut mouth to finish her up. I named her Dinkles (I don't know why she wanted that name ,but there it is. Remember they 'talk' to me )This is simple and you cant mess it up because it is meant to look awful!!
Next I scattered some dry moss and anything else you have on hand( dried flowers,herbs .Those kind of things) Places a skull down by it with some filled glass bottles.
The bowels and ash filled jars as so simple it should be illegal! simply take your bowels/jars and put ash or sand in them.Add skulls and bones and mix it around lightly so you can see them peeking out .Play with them till you get the look you want.repeat for as many as you like.
 |
| Daddy's Ashes |
 |
| Skull terracotta jar |

 I had some glass jars that my husband'd mom gave me and I put the glass bottles in them like they are waiting to be filled with some voodoo brews.I hand sewed some little pouches and tied them with twin for voodoo charms.I placed them in the jar as well.I then used a mason jar and filled it with my dry moss and tied twine around it to hide the lid grooves.I used twine on a class jar candle and sat it on the table waiting to be lit for some late night spell casting.I set the table up with some empty glass bottlen with clay corks ,and then arranged the table until I was happy with the look . The bone filled jars were sat on the table behind the doll giving it that finishing touch .Making my halloween complete!(yea right ,I am still creating ! ) You can find my Bone Jars here http://salemdarkhallow.blogspot.com/2011/09/spooky-bone-jars-tutorial.html.

That is it for the Halloween decorating tuts.I hope you are inspired to create on a budget, reuse/recycle and share your talents with others .
I will be creating all the time.Halloween is my favorite time of the year .I never stop and I am inspired all year long to make pumpkins,brooms,trolls and just about anything to due with this holiday we call Halloween.
YOU’RE NEVER TOO OLD TO ENJOY HALLOWEEN!


No comments:
Post a Comment